In this post, I am going to give you the instructions to knit your own doll dress. My doll is a hand sculpted, polymer clay doll. She is approximately 12 inches tall. Her chest is 5 inches around. Her waist is 3 1/2 inches around and her hips are 5 inches around. The yarn I used for this project is 100% cotton. It is a medium weight yarn, and a number 4 needle is suggested on the packaging. The yarn is called Crafter's Secret Cotton. I found it at my local craft store.
To begin, I used circular needles in a size 2. I cast on 70 stitches, and knitted the next row.
For the third row, I made a ribbing pattern. I knitted 2 stitches, and then purled 2 stitches. I followed this pattern to the end of the row. I did not join the two ends to form a circle. Instead, I treated the needles as if I was knitting on straight needles. You can certainly use straight needles for this project. I just like to knit using circular needles.
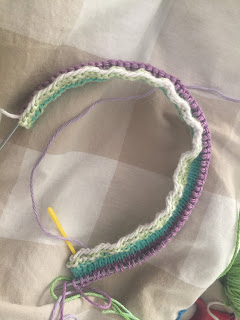
In the picture below, I am knitting each knit stitch and purling each purl stitch . When you flip your work after finishing the last row, you will see that the knit stitches you ended with are now purl stitches. On this row, you purl 2 then knit 2 across to the end of the row.
The picture below shows how the piece looks after one more row of ribbing.
Knit the next row- row 5.
Purl the next row- row 6. Repeat rows 5 and 6 until you reach approximately 2 inches. End on a purl row, so that you will begin the next row with the knit stitch.
For this dress, I began to make the skirt smaller by using the slip, slip knit technique. I plan to not begin this technique so early in this pattern if I decide to make this dress again. I will wait until the skirt reaches 3 inches to begin making the skirt smaller. Below you can see that I have slipped two stitches onto my right needle to knit them together.
In the picture below, I am making the middle of the skirt smaller so that I can bring the skirt in to make a waist.
Unfortunately, it was at this time that my son, who loves to use my phone to play games, absconced with my phone for the afternoon. I do not have any more step by step pictures of this dress. Below I have typed the actual pattern I created while I knitted this dress.
Row 1- Cast on 70 stitches
Row 2- Knit to the end
Row 3- Knit 2, Purl 2 to the end
Row 4- Purl 2, Knit 2 to the end
Row 5- Knit to end of row
Row 6- Purl to end of row
Repeat 5 & 6 until skirt is 2 inches long. Make sure your next row is a knit row.
Next row- Slip, slip knit first two stitiches. Knit to last 4 stitches. Knit 2 together 2x's.
Next row- Purl to end
Repeat these last two rows until work is 3 1/2 inches long ending on a purl row so your next row is a knit row.
Next row- Slip, slip knit 2x's. Knit to middle two stitches and slip, slip knit them together. Knit to the last 4 stitches. Knit 2 together 2x's.
Next row- Knit to the middle 2 stitches and slip, slip knit them together. Knit to the end of the row. Next row- Purl to the end of row
Repeat these last two rows until work is 4 inches.
Next row- Slip, slip knit every every stitch across to make the waist.
Next row- Purl to the end.
Check your dress against your doll's waist. If needed, slip, slip knit a few stitches, if the waist is still too large. Do not make it too small, so that you do not need to add stitches for the chest.
Next row- Knit to end
Next row- Purl to end
Continue for the length of your doll's torso.
Next row- Knit to the end
Next row- Knit to the end- this will make a garter stitch
Repeat for 4 rows
Last row- Knit two stitches and bind off the entire row. When binding off, use the needles to pull the second stitch through the first stitch, leaving one stitch on the needle and the other stitich is now off the needle.
Finishing your dress, turn the dress inside out and place the two sides toether. Using a darning needle made for knitting, whip stitch the two pieces toether. A whip stich is just basically joining the two pieces by stiching the side closest to you and joining the side away, then pulling yarn through both. Next bring the needle back to the side closest to you and stich through the next stich. The yarn will loop across your work. I usually work from right to left, but either direction will work. Turn the dress right side out and place your dress onto your doll. I find that feet first works the best. The top will be slightly smaller than the hips as you pull the dress up, but the stocking net stitch will stretch enough to get the dress all the way up.

I hope you enjoyed this tutorial. I will post more knitting ideas as I make new dresses. I have also created a mermaid dress and a mermaid skirt. This dress pattern should fit most fashion dolls closely. I know this dress fits my Blthe clone perfectly, and she has an average sized body.


Comments
Post a Comment